Creating a New Process (Scenario) in the Orchestrator#
To add a new Process to the Orchestrator, go to the “Processes” screen. This screen contains two tables: “Processes” and “Process Versions”.
.png)
Click the “Create” button above the “Processes” table and fill out the form that appears:
.png)
- field “Name*” (mandatory) - the name of the Process, the current date, and the time of version creation. This data can be changed to the relevant name if necessary;
- field “Run on Sherpa RPA Runtime version no lower than” - the version number of Sherpa RPA Runtime below which the Process will not run;
- field “Description” (if necessary) - a description for the created Process;
- field "Access Folder" - the access folder for the created Process;
- flag "Available through Sherpa Assistant" (check the flag if necessary) - this Process is available through Sherpa Assistant.
After filling in the fields, click the “OK” button to save the Process. A new Process will appear in the “Processes” table. The new Process has no versions. To create a version of the Process, check the flag next to the Process for which you want to create a version.
.png)
If no Process is selected, the Orchestrator will warn you with a message:
.png)
Above the “Process Versions” table, click the “Create” button and fill out the form that appears:
.png)
- field “Name*” (mandatory);
- field “Description” (if necessary);
Using the “Select Process File” button, attach the Process file by selecting it from your computer files. After attaching the file, a "Download" button will appear next to it:
.png)
 | A Process file (file with the .robot extension) must be attached. Without the file, the Process version will not be saved. |
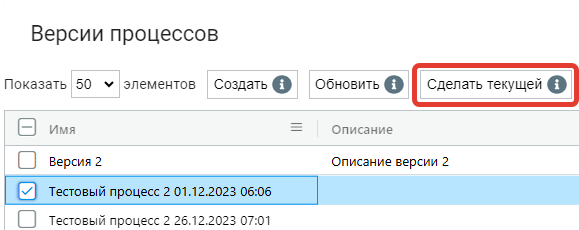
Multiple versions of each Process can be created. The current version of the Process is highlighted in bright blue:
.png)
To set the current version of the Process, select the version with the mouse and click the “Make Current” button: