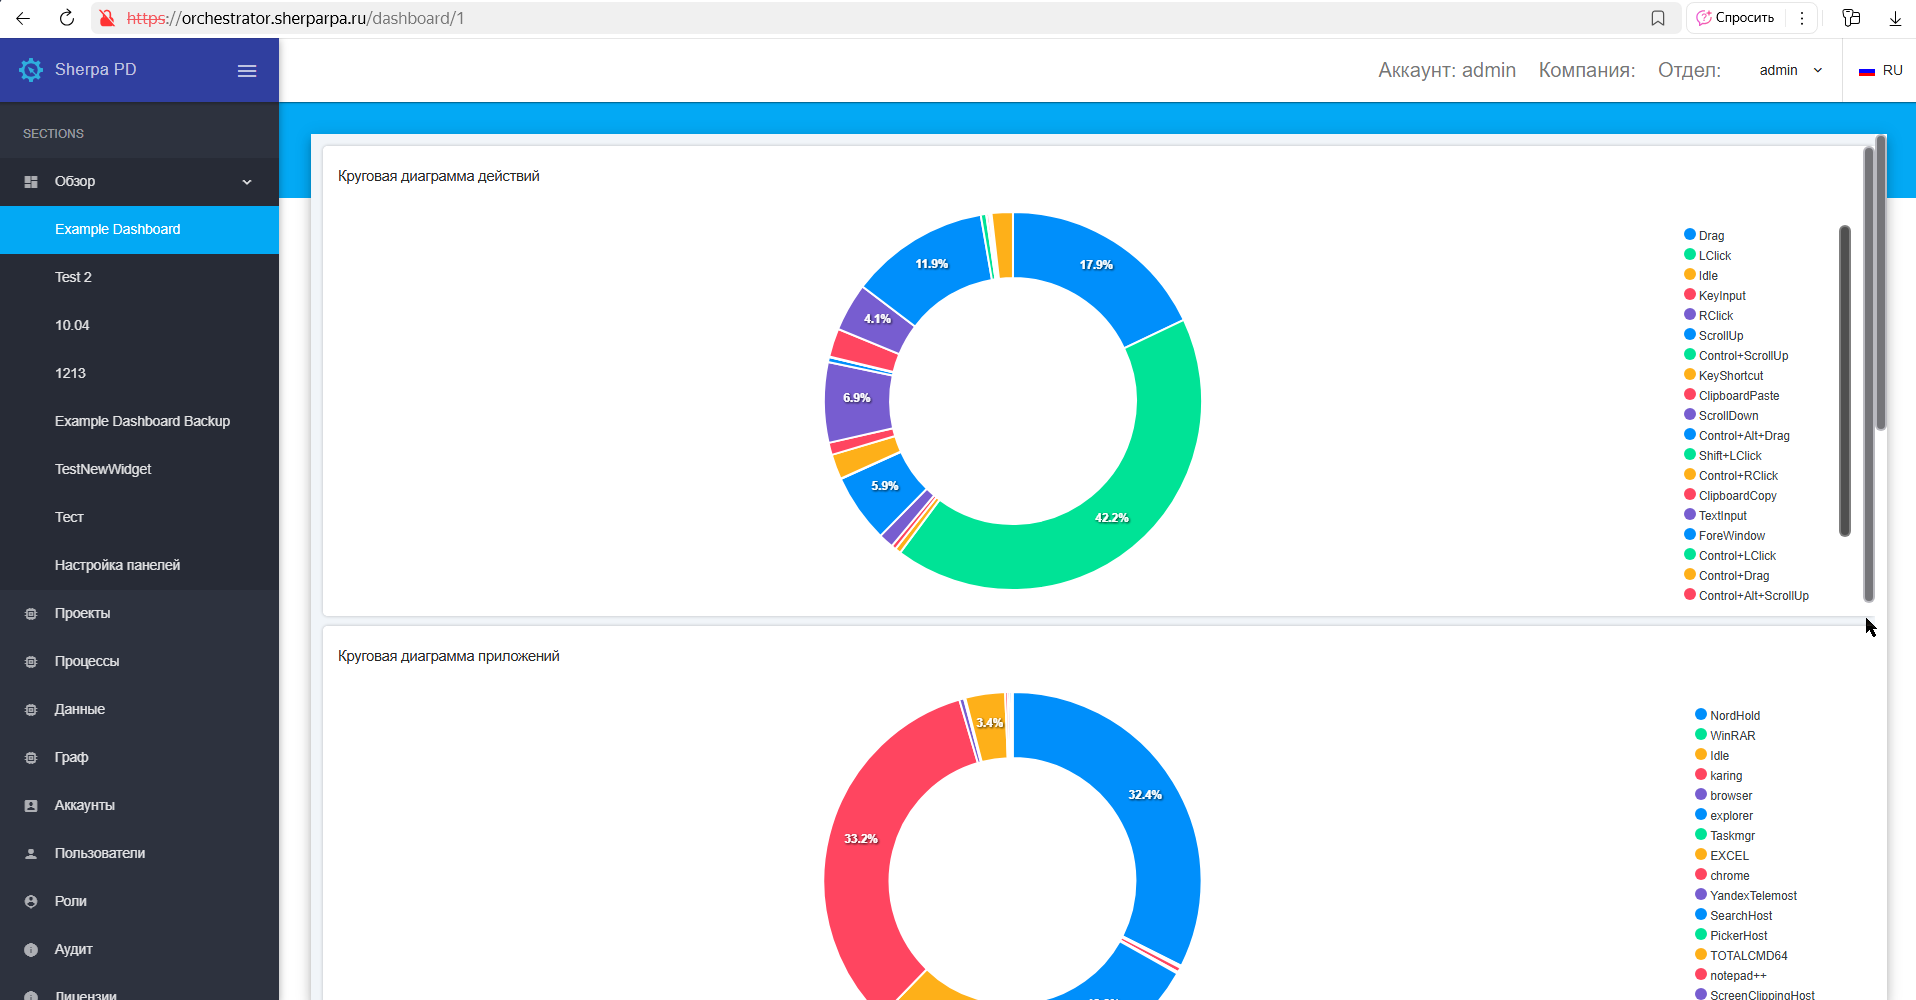
Overview#
The "Overview" screen provides the ability to create and edit custom Dashboards using the builder or SQL console.
To access all the tools and features needed to create Dashboards, follow these steps:
1. Opening the Dashboard Builder#
To open the Dashboard builder, log into your account in the "Sections" menu and navigate to the "Overview" ("Dashboard") section;
Click on the "Customize Dashboards" tab;
2. Creating a New Dashboard#
To create a new Dashboard:
- Click the “Create” button.
- Enter the name of your Dashboard in the “Name*” field. Fill in the “Description” field if necessary. Click the OK button.
- Click on the icon
(Form Designer).
Now you can start adding Widgets.
3. Adding Widgets to the Dashboard#
In the builder menu, find the panel with available widgets. To do this, click on the popup menu icon:
.png)
In the popup window, you can use the following icons in the upper right corner:


In the "Widget Settings" window, you can choose options to customize the appearance of the Dashboard.
General Fields#
- “Widget Name *” – a text field that is filled in manually from the keyboard;
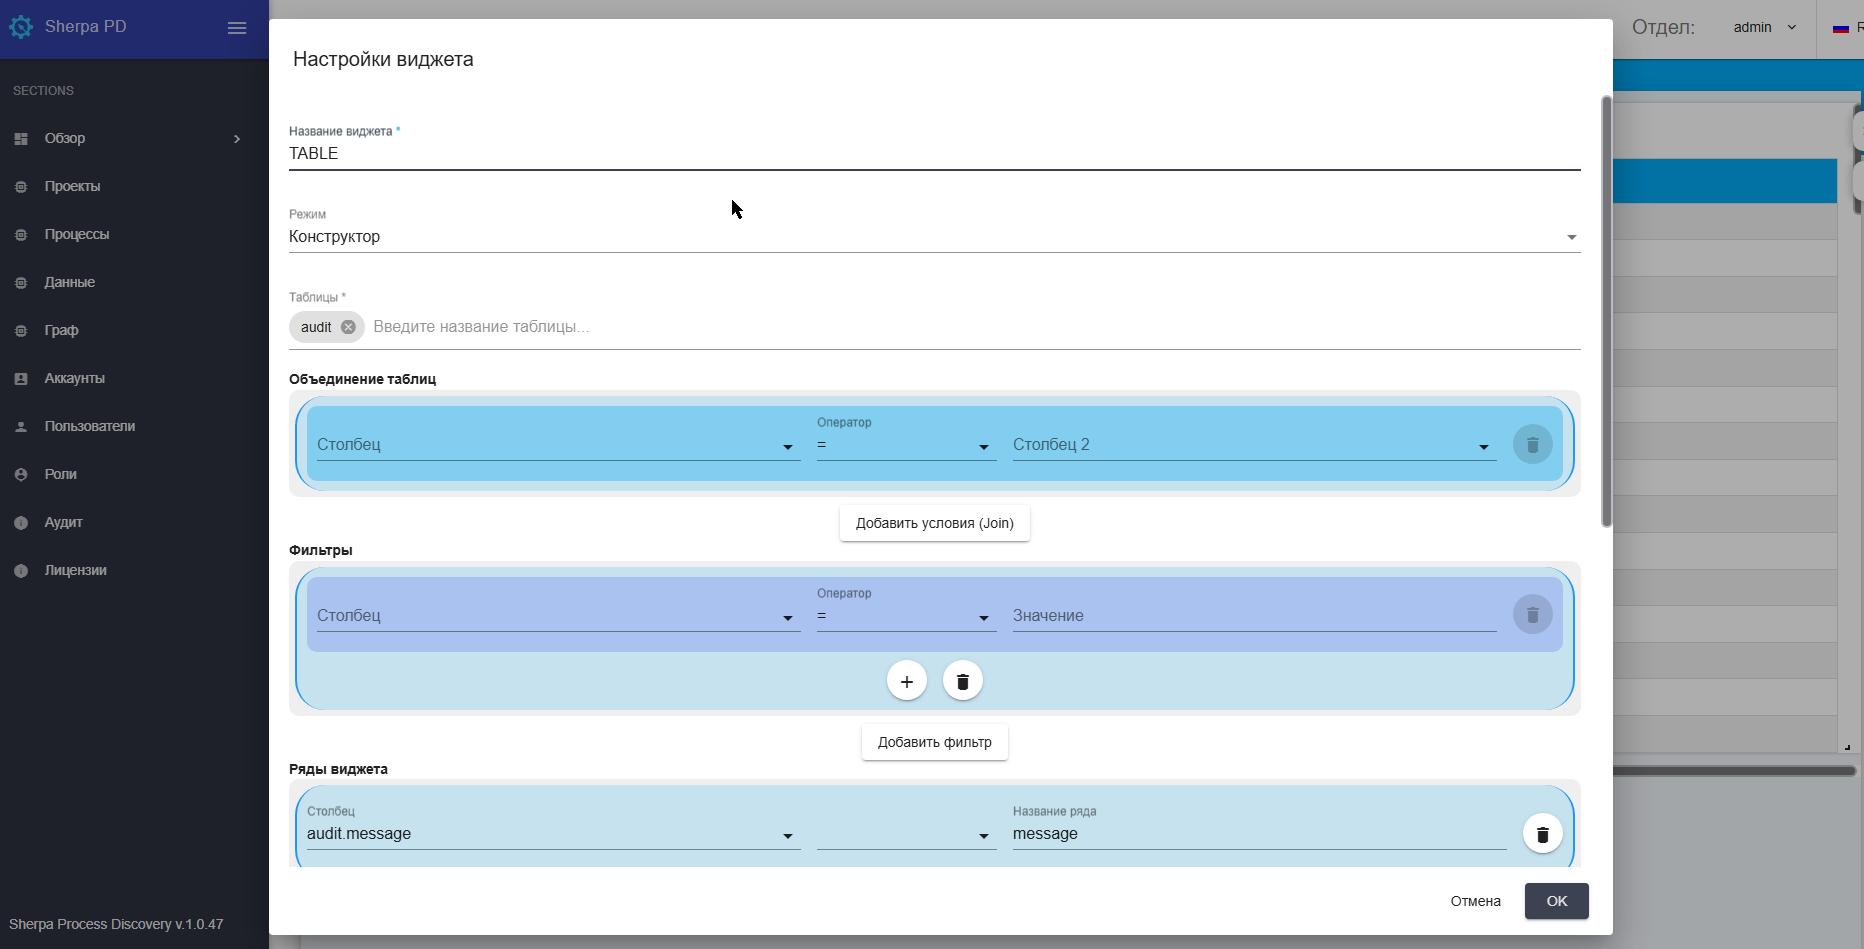
- “Mode” – a dropdown list where you need to select the query creation mode for the widget:
| Name | Description |
|---|---|
| Builder Mode | Allows you to assemble a query from separate blocks. Each block (Table Join, Filters, Widget Rows, Group By, Sort, Row Count) has the option to configure the necessary commands for working with data, arithmetic and logical commands, comparison operators. |
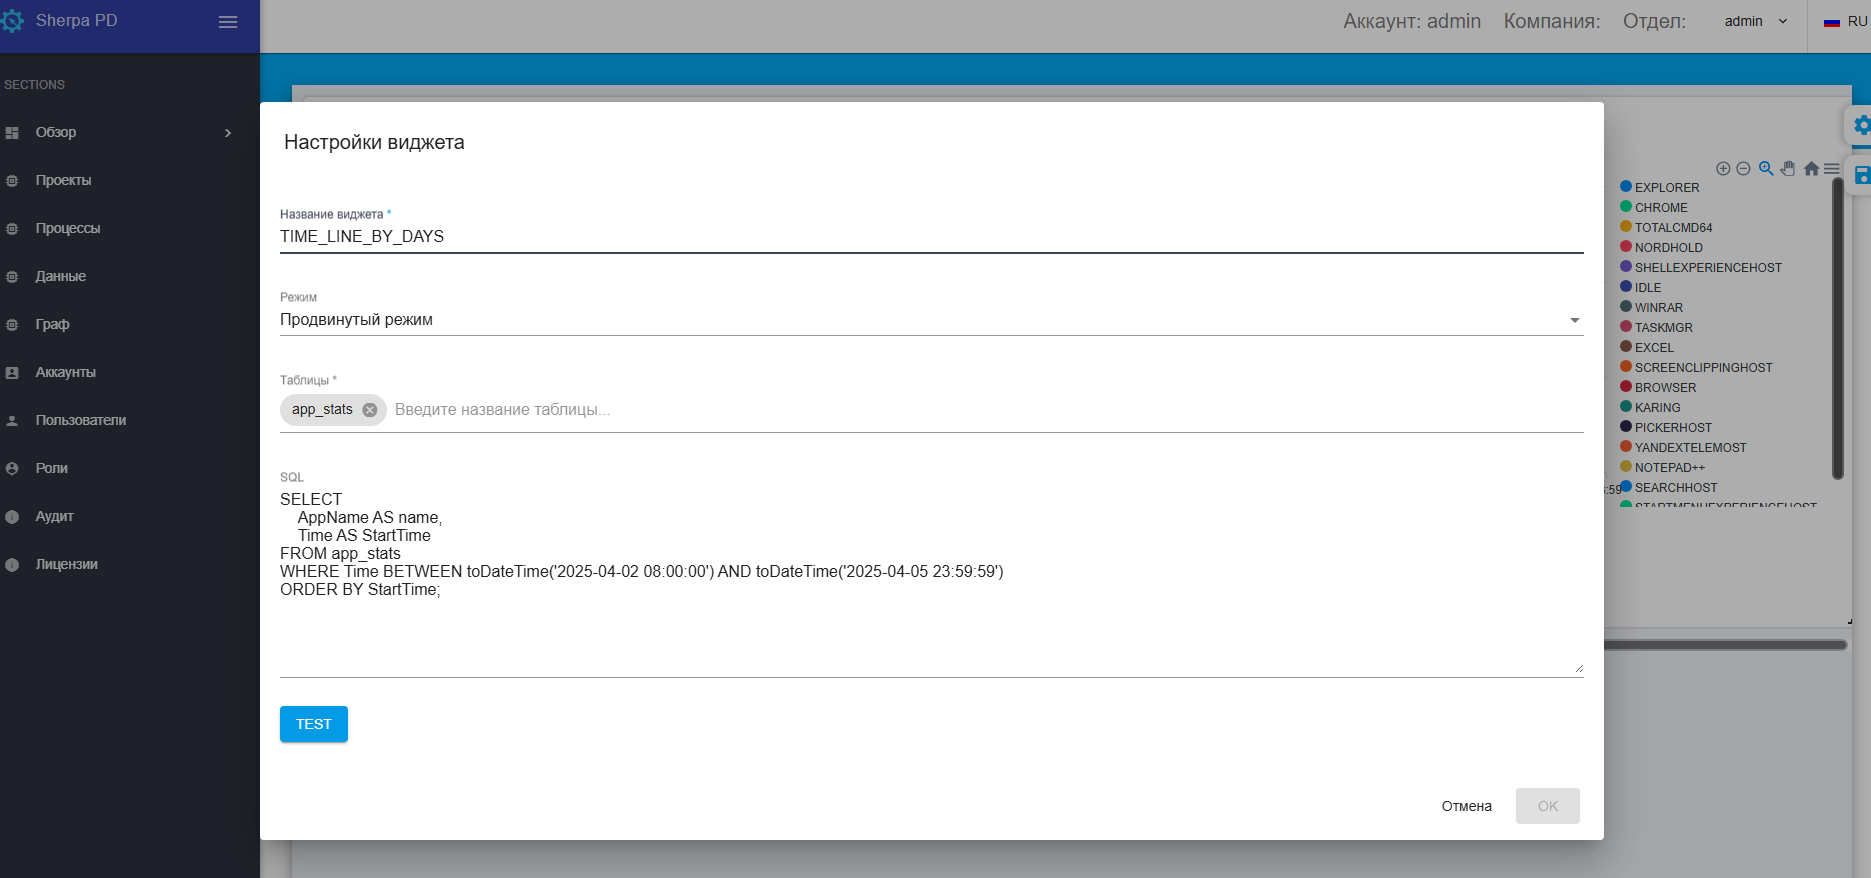
| Advanced Mode | Allows you to manually enter a query in the SQL field: |

- “Tables” – a dropdown list with all available database tables.
Example of a manually entered query:
4. Managing Dashboards and Access#
To manage access to the Dashboards you have created:
1) Go to the Customize Dashboards section;
2) Click on the icon 
3) Specify which users or user groups will be granted access to your Dashboards in the Access folder field;
4) Save the changes by clicking the “OK” button.
Managing access to Dashboards ensures the confidentiality and security of information.
5. Using the Default Dashboard#
To use the default Dashboard and see it upon logging into the system:
1) Check the box to the left of the Dashboard name: 
2) Click the button 
6. Cloning a Dashboard#
To clone a Dashboard:
1) Check the box to the left of the Dashboard name:
2) Click the button 
7. Deleting a Dashboard#
To delete a Dashboard, use the icon to the right of the Dashboard name 

where you need to confirm the action by clicking the “Yes” button, or:
1) Check the box to the left of the Dashboard name:
2) Click the button 