Initial Installation and Configuration of Platform Components (using Sherpa Orchestrator as an example)#
Step 1#
On the Robots screen in Orchestrator, create a new Robot entry and set the Role to "Coordinator".
.png)
After that, enter the editing of the entry and copy the GUID of this coordinator robot.
.png)
Step 2#
From the administrator account of the terminal server, install SherpaRPACoordinator.exe.
.png)
During the installation of the Coordinator, you need to enter the domain of the Orchestrator server and the Coordinator's identifier (GUID).
.png)
The Coordinator ID in the "Robot" window:
.png)
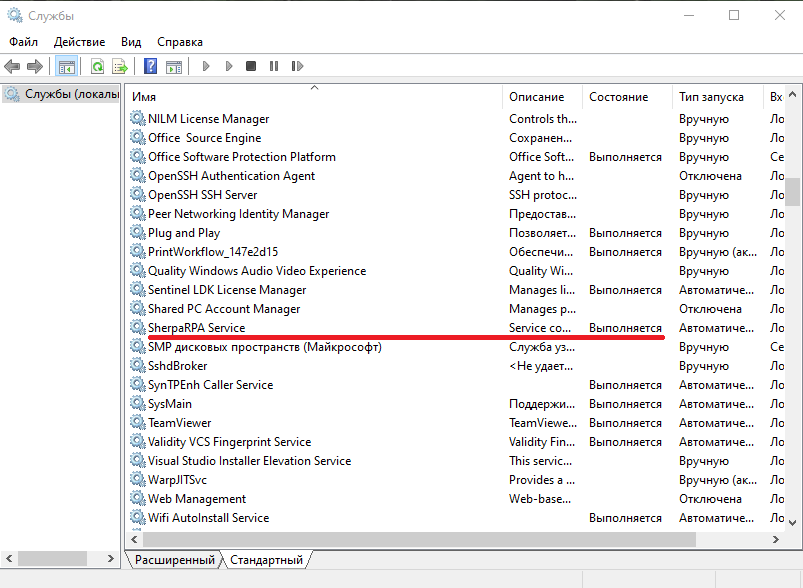
Next, you need to check the connection by clicking the "Check Connection" button. If necessary, you can also configure the connection parameters through a proxy server by clicking the "Proxy Settings" button. Upon successful connection, the installation starts by clicking the "Next" button. After the installation of the Coordinator is complete, the Sherpa RPA Service is started.
When checking for the Sherpa RPA Service in the services registry, it is seen that it is installed and is in the "Running" state:
Step 3#
For each account on the terminal server that is supposed to run Python robots, it is necessary to create the corresponding Unattended robot in Orchestrator. To do this, on the Robots screen in Orchestrator, create a new Robot entry and set the role to "Unattended":
.png)
You need to select the previously created coordinator robot, enter the IP or domain name of the machine with Unattended robots, the login (with the domain, if any), and the password for the User account under which the Robot should log in. If Active Directory is used, the login of the account should be specified with the domain name in the "Account Login" field.
In the dropdown list, you need to select the Coordinator through which the Unattended robot will be launched:
.png)
You also need to specify the license keys in the "License Key" field, which were previously added on the Licenses screen. You must select the Unattended license. The license must be pre-registered in Orchestrator and activated (the expiration date of the License must be later than the current day).
After saving the created entry, you need to re-enter its editing and copy the GUID of this Unattended robot.
Step 4#
Next, log into the User account on the terminal server under which this Python robot should be launched and paste the value of the copied GUID from the previous step into the corresponding RobotGUID variable in the local Python framework script.
Then, open the local Windows Task Scheduler and create a new entry for the current User.
As the Trigger, specify: "On remote connection to user session".
In the Trigger settings, specify:
- "Any user" and "Connection from a remote computer" (for standalone virtual machines for each Robot)
- "Connection from the local computer" (for robots hosted on the same terminal server as the Orchestrator).
As the Action, specify: "Start a program". In the path for launching, specify the path to the Python interpreter, and in the launch parameters, specify the path to the specific Python framework script for this account.
.png)
Step 5#
Log out of the current User account using Log off (not by closing the RDP window).
Repeat step 3 and step 4 for each of the Python robots on this terminal server.
Authentication Mechanisms#
Authentication of the Sherpa Coordinator and the Python framework script in Orchestrator is carried out using a Bearer Token, which is passed in the HTTP RESTful request headers. The Bearer Token is matched with the unique GUID of each instance of the Python robot and the Sherpa Coordinator.